Day27 and Day 28:Jenkins Declarative Pipeline with Docker and Jenkins Agents


Use your Docker Build and Run Knowledge
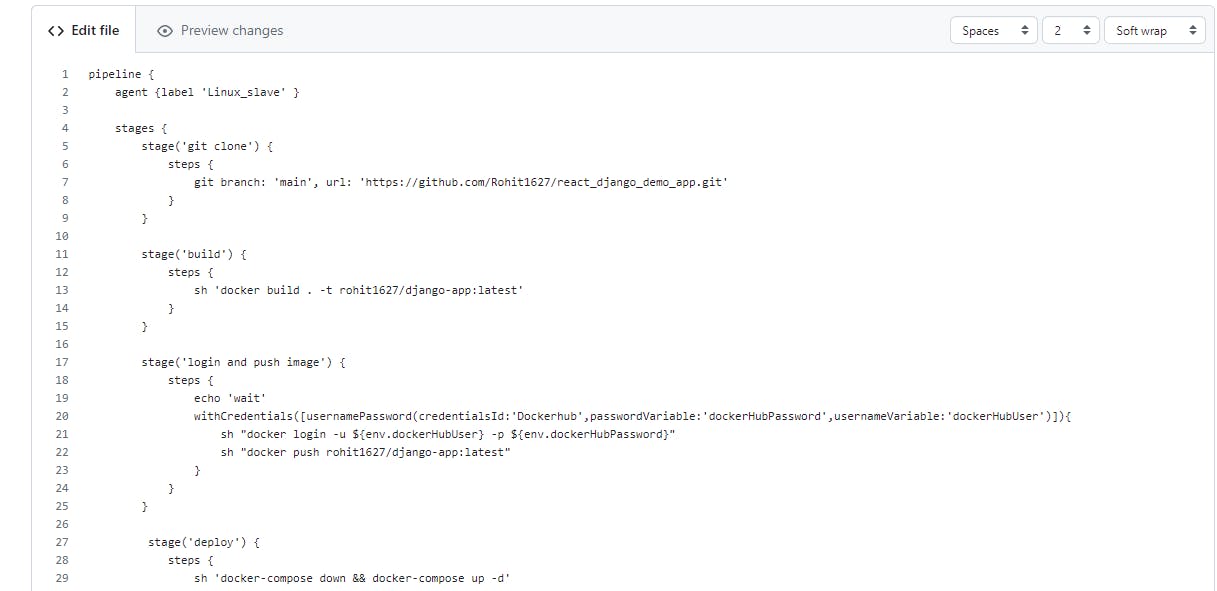
docker build - you can use sh 'docker build . -t <tag>' in your pipeline stage block to run the docker build command.
docker run: you can use sh 'docker run -d <image>' in your pipeline stage block to build the container.
build the container.
How will the stages look
stages {
        stage('Build') {
            steps {
                sh 'docker build -t trainwithshubham/django-app:latest'
            }
        }
    }
Task-01
Task-01
1)Create a docker-integrated Jenkins declarative pipeline
In Jenkins, Click on “New Item”, create a new pipeline job, and select "Pipeline" as the project type.
2)Use the above-given syntax using sh inside the stage block
In the configuration, In the pipeline script section, define your stages, steps, and parameters.

Save and run the pipeline. You should see the pipeline execute each stage and run your application inside a Docker container.
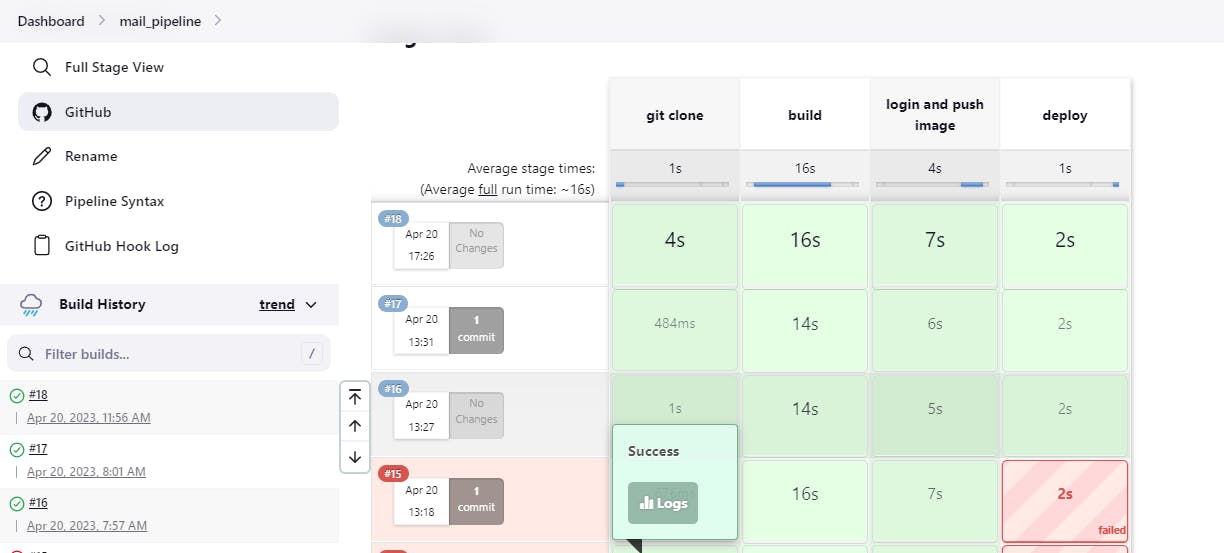
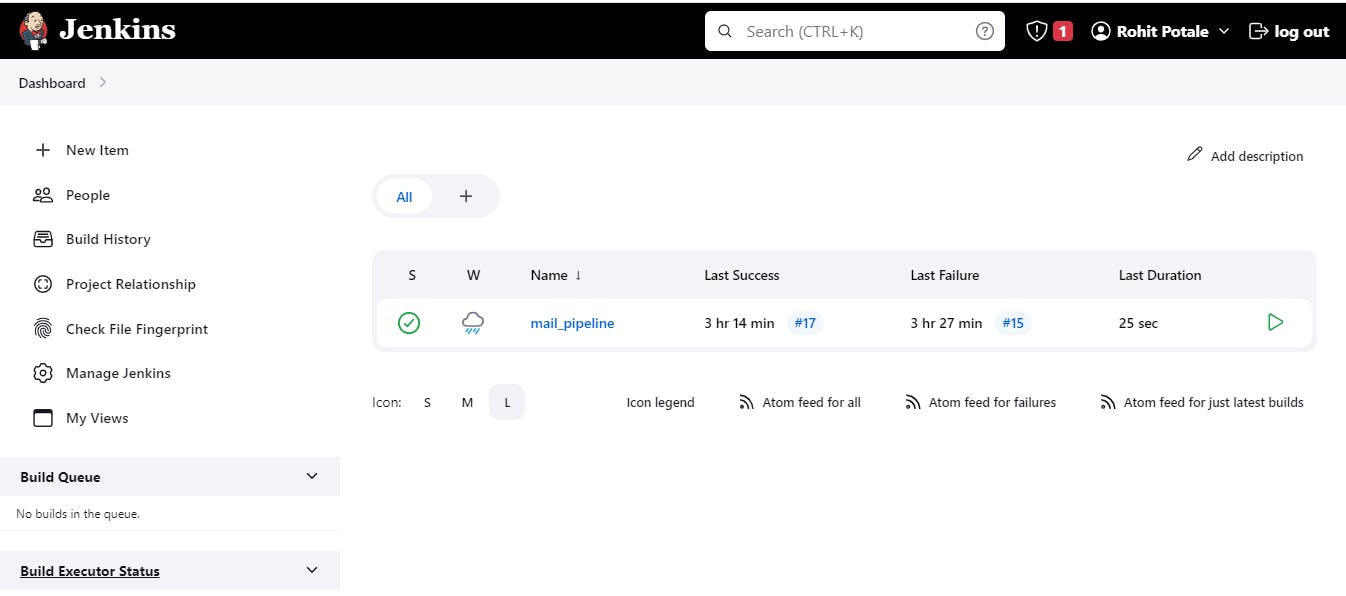
The declarative pipeline runs successfully with docker.
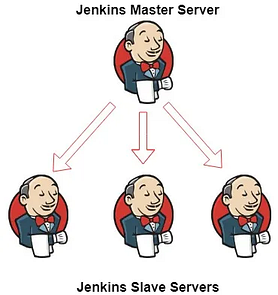
What is Jenkins Master (Server)
Jenkins’s server or master node holds all key configurations. The Jenkins master server is like a control server that orchestrates all the workflow defined in the pipelines. For example, scheduling a job, monitoring the jobs, etc.
Jenkins Agent
An agent is typically a machine or container that connects to a Jenkins master and this agent actually execute all the steps mentioned in a Job. When you create a Jenkins job, you have to assign an agent to it. Every agent has a label as a unique identifier.
When you trigger a Jenkins job from the master, the actual execution happens on the agent node that is configured in the job.
A single, monolithic Jenkins installation can work great for a small team with a relatively small number of projects. As your needs grow, however, it often becomes necessary to scale up. Jenkins provides a way to do this called “master to agent connection.” Instead of serving the Jenkins UI and running build jobs all on a single system, you can provide Jenkins with agents to handle the execution of jobs while the master serves the Jenkins UI and acts as a control node.
Pre-requisites
Let’s say we’re starting with a fresh Ubuntu 22.04 Linux installation. To get an agent working make sure you install Java ( same version as Jenkins master server ) and Docker on it.
Note:- While creating an agent, be sure to separate rights, permissions, and ownership for Jenkins users.
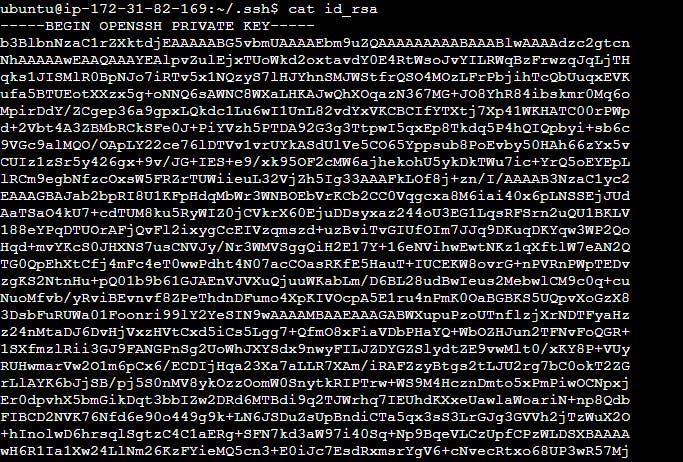
Step 3:- Create an SSH key on the master server and connect with the agent slave with the public key.
How to generate SSH key:- https://chathura-siriwardhana.medium.com/step-by-step-guide-to-add-jenkins-slave-nodes-f2e756c8849e
Master-slave Private ssh key:-
Master-slave Public ssh key:-

Now you can add the master-slave public key on agent-slave on the authorized_keys file.

Step 4:- Create an agent-slave node on Jenkins.
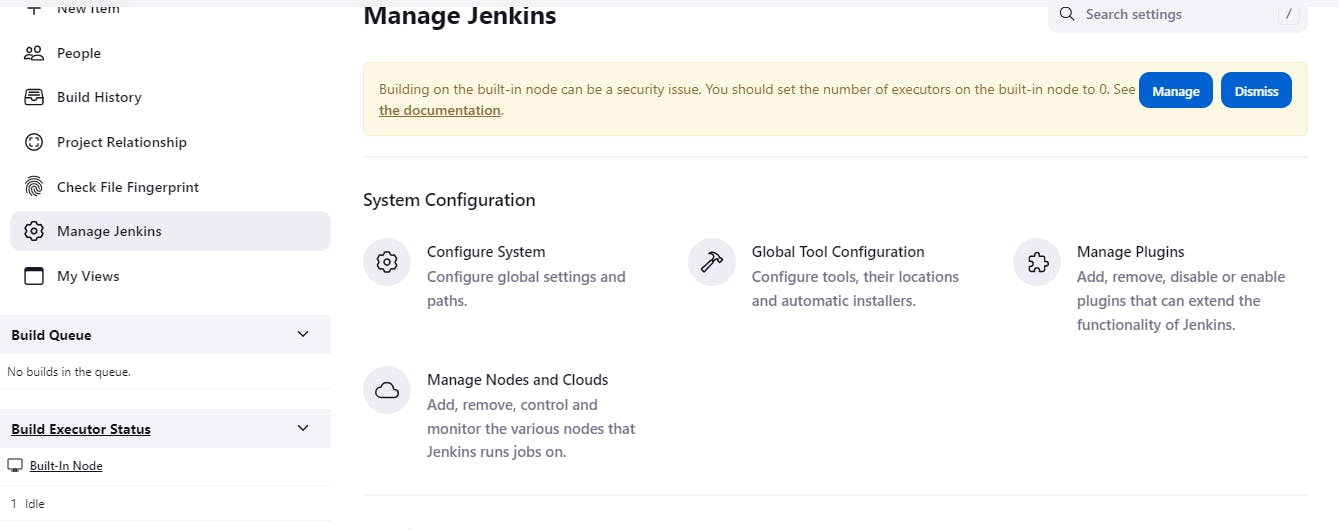
Now we’re ready to finish setting up the node via the Jenkins UI. In Jenkins, go to Manage Jenkins, then Manage Nodes, then click New Node. Here you can give your agent node a name, then select Permanent Agent and click OK. There are a variety of options you can use here to customize your node. All we care about right now is the Launch Method.
Select Launch Slave Agents via SSH for Launch Method.
Enter the hostname or IP address of your agent node in the Host field.
Click the Add button next to Credentials and select the Jenkins scope.
For the credential, set Kind to SSH username with the private key.
Enter Jenkins for the username.
For the private key, select Enter directly. Then, copy the contents of your private key file (~/.ssh/id_rsa by default) and paste it into the Key box.
If you used a passphrase when generating the key, enter that for Passphrase, otherwise, leave it blank.
Enter a descriptive id and description, then click Add.
Click Save to save the new node.
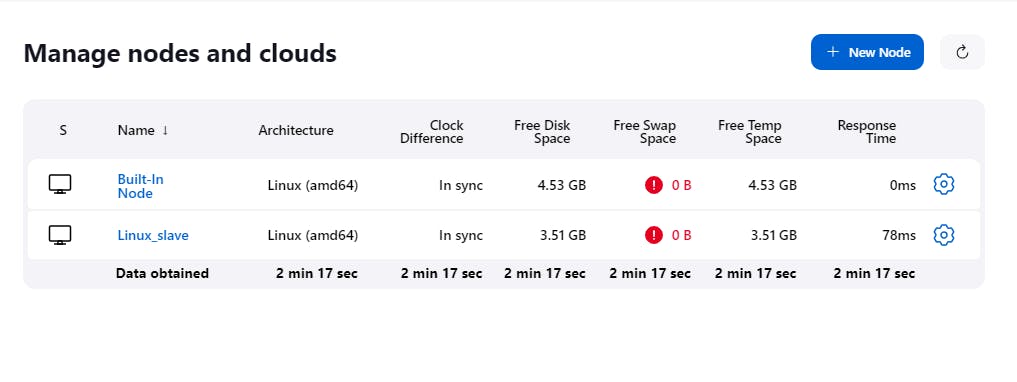
Agent-slave is successfully connected now.
Thank you for reading!! I hope you find this article helpful