Day 38 Getting Started with AWS Basics☁
Hey there! I am Rohit !! I started writing articles on my DevOps and cloud journey👩🏻💻. My purpose is to share the concepts that I learn, the projects that I build, and the tasks that I perform regarding DevOps. Welcome to my blog!!
AWS:
AWS (Amazon Web Services) is a comprehensive cloud computing platform offered by Amazon. It provides a wide range of services including storage, computing power, networking, databases, and more. With AWS, businesses can scale their infrastructure on demand, reducing costs and improving efficiency. It offers a global infrastructure that enables users to deploy their applications and services in various regions around the world. AWS also provides robust security measures, ensuring data protection and compliance with industry standards. Overall, AWS empowers organizations to leverage the benefits of cloud computing and drive innovation in their operations.
IAM:
IAM (Identity and Access Management) is a service provided by AWS (Amazon Web Services) that helps manage user identities and their access to AWS resources. IAM allows you to create and control users, groups, and roles, enabling you to grant or restrict access to various AWS services and resources. With IAM, you can define fine-grained permissions and policies, granting users only the necessary privileges to perform their tasks.
IAM also supports multi-factor authentication (MFA) for added security and provides auditing capabilities to track and monitor user activity. Overall, IAM is a critical component of AWS security, allowing you to establish a robust and controlled access management system for your AWS environment.
Task1:
Create an IAM user with the username of your wish and grant EC2 Access. Launch your Linux instance through the IAM user that you created now and install Jenkins and docker on your machine via single Shell Script.
To create an IAM user with EC2 access, follow these steps:
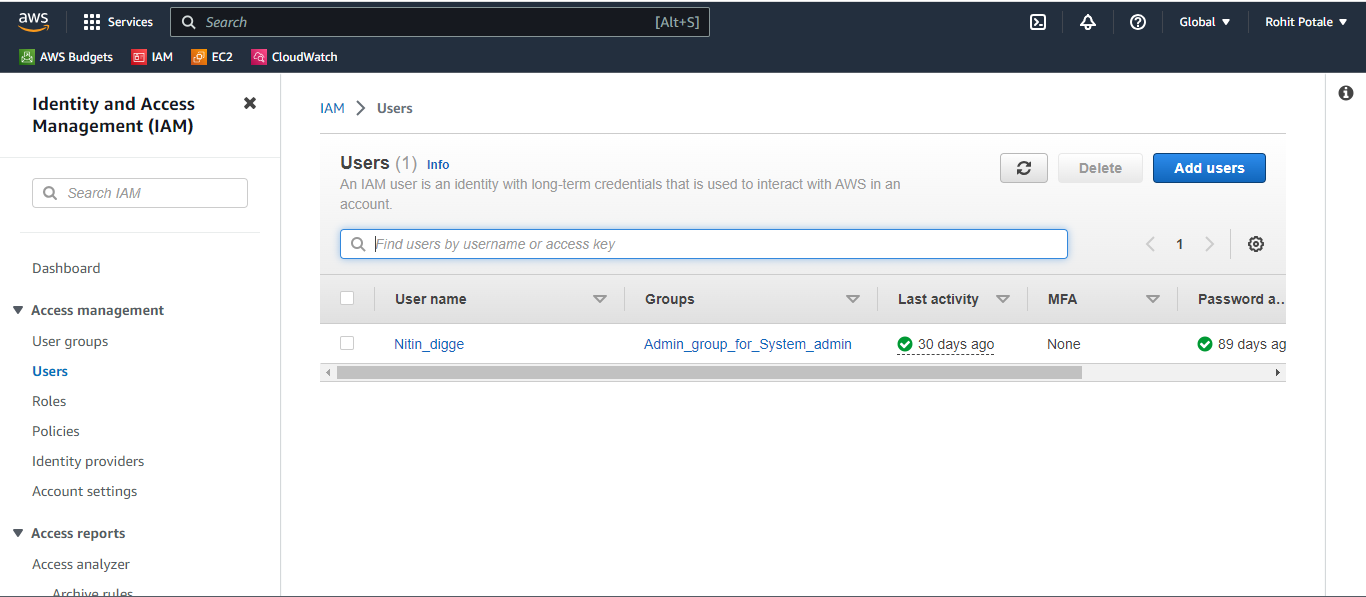
Log in to the AWS Management Console. Login as a root user and type “IAM” in the search box. Go to the IAM service and click on "Users" in the left menu.

Click on "Add user"
Enter the user name as per your choice. click on "Provide user access to the AWS management console"

Select " I want to create an IAM user" -> Select the password method and click next

Select "Attach existing policies directly" and select the policy "AmazonEC2FullAccess"

Click "Next" until you reach the end, and then click "Create user"
Take note of the username and password, as you will need these to authenticate your IAM user when launching instances.

To launch a Linux instance using your IAM user, follow these steps:
Sign in AWS account as an IAM user which we created above.

Go to the EC2 service and click on "Launch instance".
Choose a Linux AMI.

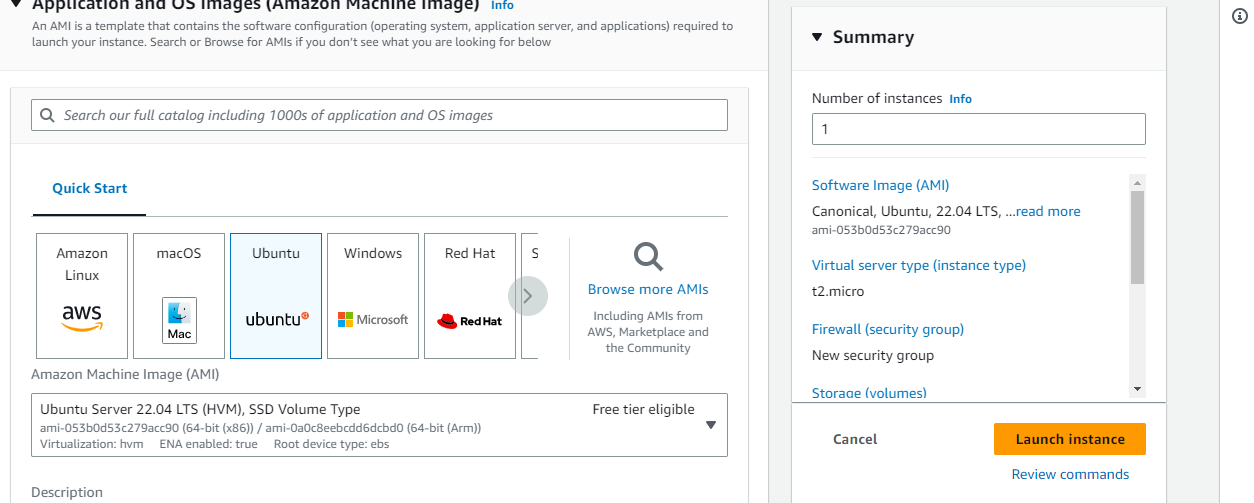
Select an instance type t2.micro and create a new key-pair or user old one
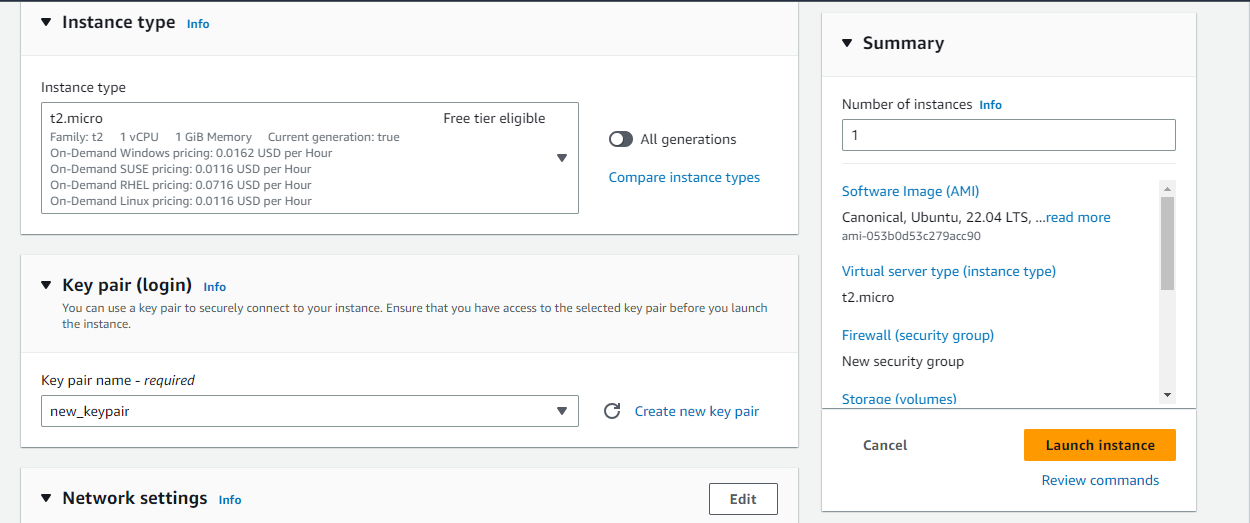
click on Launch instance

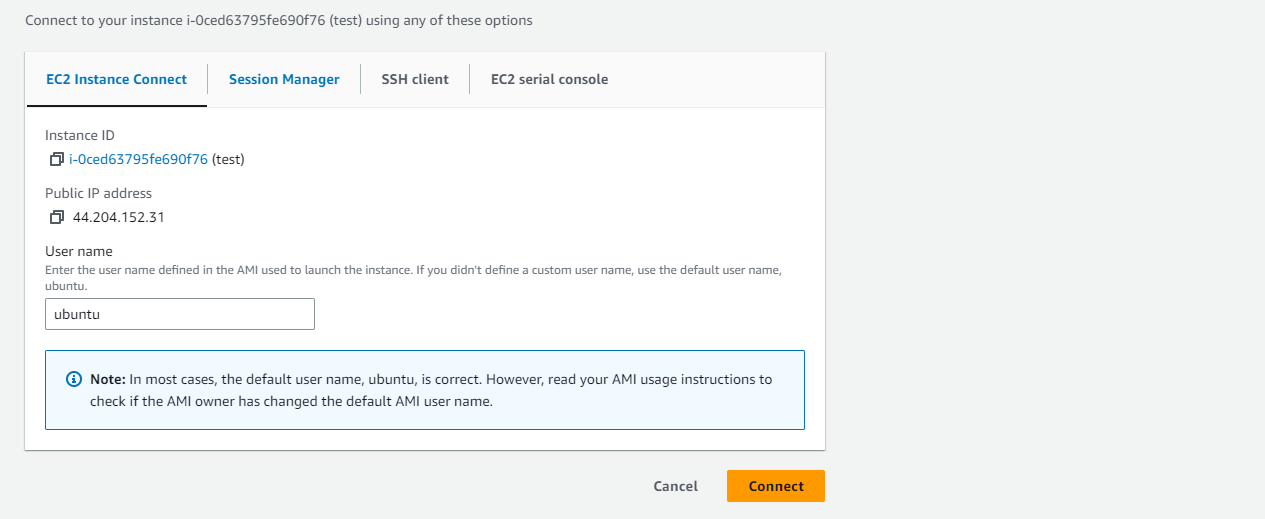
connect the instance with click on "connect"
Install Jenkins and docker on your machine via single Shell Script.
#!/bin/bash

# Update the package list
sudo apt-get update

# Install Docker
sudo apt install docker.io -y

# Start docker
sudo systemctl start docker

# Enable docker service
sodo systemctl enable docker

# Install open JDK
sudo apt install openjdk-11-jre -y

#jenkins installation
curl -fsSL https://pkg.jenkins.io/debian/jenkins.io-2023.key | sudo tee \
  /usr/share/keyrings/jenkins-keyring.asc > /dev/null
echo deb [signed-by=/usr/share/keyrings/jenkins-keyring.asc] \
  https://pkg.jenkins.io/debian binary/ | sudo tee \
  /etc/apt/sources.list.d/jenkins.list > /dev/null
sudo apt-get update
sudo apt-get install jenkins -y
sudo systemctl start jenkins
sudo systemctl enable jenkins

# Add the current user to the docker group to run docker commands without sudo
sudo usermod -a -G docker $USER
sudo usermod -a -G docker jenkins
Check the docker and Jenkins running status.


Task2:
In this task, you need to prepare a DevOps team of Avengers. Create 3 IAM users of Avengers and assign them to devops groups with IAM policy.
In the IAM dashboard, click on “Users” and then “Add user.” Create 3 IAM users of Avengers. Enter the username for the first IAM user (e.g. “Hulk.”). Repeat this step to create two more IAM users with the usernames “Hawkeye” and “Thor”.

Create an Avengers DevOps group by clicking on the "User Groups" link in the left-hand menu and clicking on the "Create Group" button.
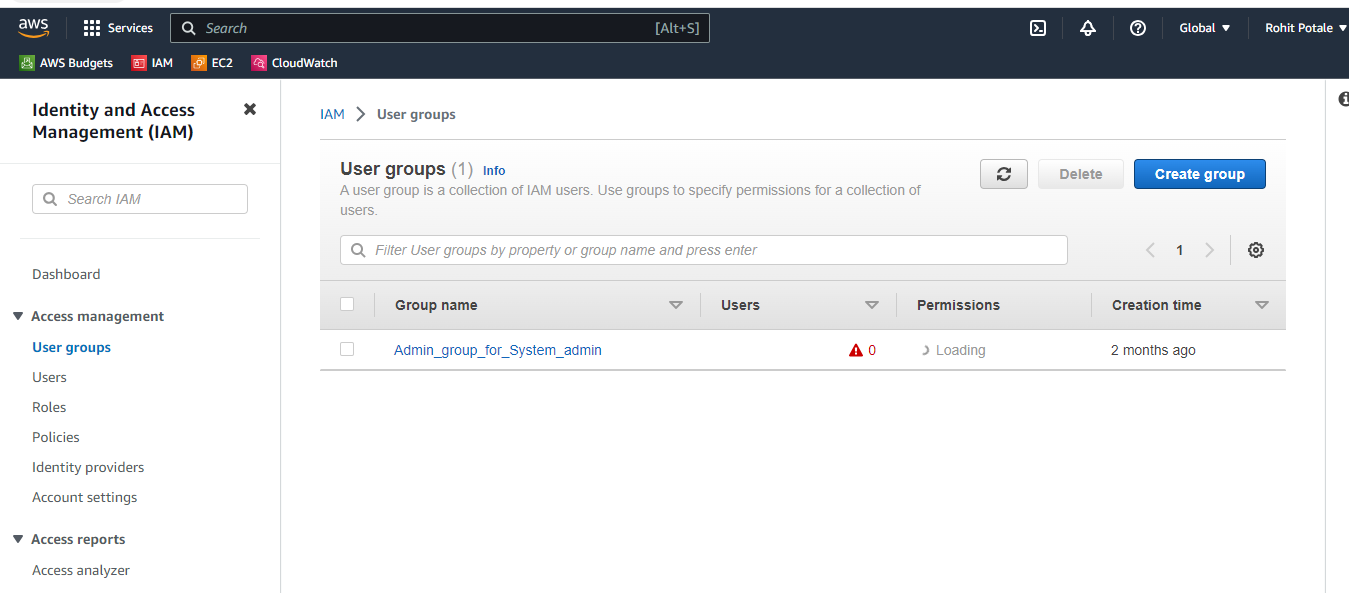
Enter a name for the group. add the three IAM users to the group by selecting the users.

In the "Attach Policy" step, search for and select the "AmazonRDSFullAccess" policies.
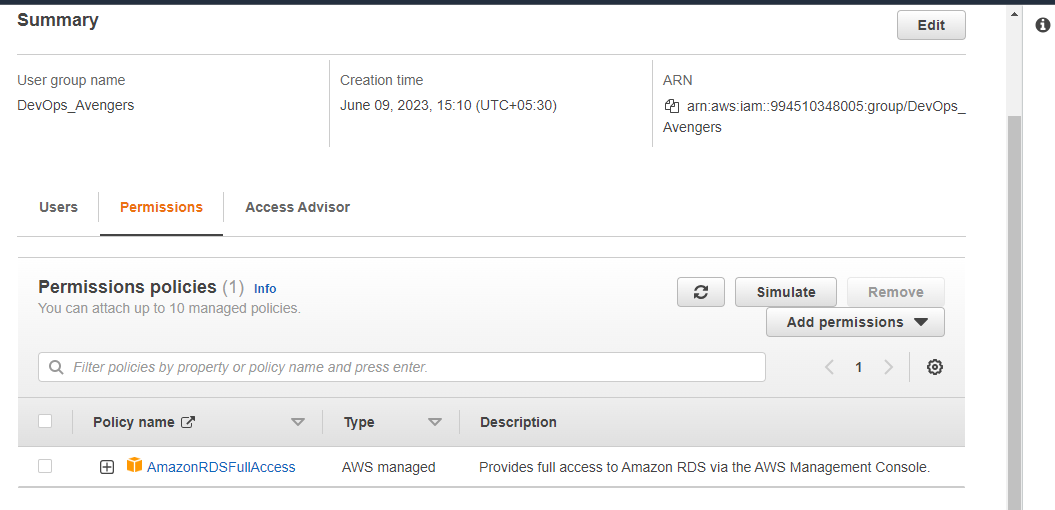
All the created users will be visible and You can add more users by clicking "Add users".
Thank you for reading!! I hope you find this article helpful......